A Comprehensive Guide to Installing Silicone LED Strips
A Comprehensive Guide to Installing Silicone LED Strips
Introduction
Installing silicone LED strips is a meticulous task that requires a blend of technical expertise and creative finesse. This comprehensive guide aims to provide a detailed step-by-step process, ensuring that you achieve a professional-grade installation, maximizing both aesthetic appeal and functional performance.

Preparation
Planning Your Installation
01. Determine Location: Identify the area where you plan to install the LED strips. Consider factors such as power access, surface material, and desired lighting effect.
02. Measure Length: Use a tape measure to determine the exact length of the LED strip required.
03. Gather Tools and Materials: Ensure you have all necessary tools, including scissors, screwdrivers, drills, and possibly additional fixings like screws, nuts, or clamps.
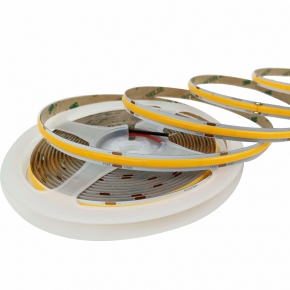
Selecting the Right LED Strip
· Voltage and Current Requirements: Ensure the LED strip you select matches the output voltage and current of your power adapter.
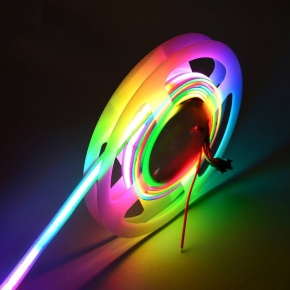
· Brightness and Color Temperature: Choose an LED strip that provides the desired brightness and color temperature suitable for your space.
Installation Steps
Step 1: Surface Preparation
· Clean the Surface: Ensure the installation surface is clean, dry, and free from any debris or contaminants that could affect adhesion.
· Mark the Path: Use a pen or marker to outline the path of the LED strip on the surface.
Step 2: Cutting the LED Strip
· Locate Cutting Points: Identify the safe cutting points along the LED strip, ensuring you do not damage the circuitry.
· Cut the Strip: Use sharp scissors or a utility knife to make a clean cut at the designated points.
Step 3: Securing the LED Strip
· Adhesive Backing: Most silicone LED strips come with adhesive backing. Simply peel off the backing and attach the strip to the surface.
· Alternative Fixing Methods:
· Screws and Nuts: For surfaces not suitable for adhesive, drill holes and secure the strip with screws and nuts.
· Clamps: Use clamps for areas where the strip needs to be frequently adjusted.
· Magnetic Fixing: For metallic surfaces, use magnetic mounts for quick and easy installation.
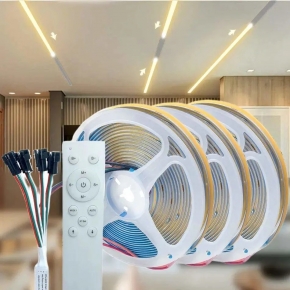
Step 4: Connecting Power
· Prepare Power Adapter: Ensure your power adapter is compatible with the LED strip's voltage and current requirements.
· Connect Wiring: Use wiring terminals or connectors to join the LED strip to the power adapter. Ensure all connections are secure and follow the manufacturer's instructions for positive and negative polarity.
Step 5: Concealing Wires
· Hide Wires: Use wire channels, conduit, or insulation tape to conceal and protect the wiring, ensuring a neat and professional finish.
Step 6: Testing and Adjustment
· Power On: Connect the power adapter to a power source and switch it on.
· Check Functionality: Inspect the LED strip for any non-functional LEDs or connection issues.
· Adjust Position: If necessary, adjust the position or angle of the LED strip to achieve the desired lighting effect.
Advanced Tips
· Use Junction Boxes: For complex installations involving multiple LED strips, consider using junction boxes to manage and conceal connections.
· Heat Dissipation: Ensure proper heat dissipation by installing the power adapter in a well-ventilated area.
Conclusion
Installing silicone LED strips can significantly enhance the aesthetic and functional appeal of any space. By following this comprehensive guide, you can achieve a professional-grade installation that not only meets your lighting needs but also complements your interior design. Ready to take the next step in transforming your space with LED lighting? Contact LEDWAY Lighting today at sales2@ledwaylighting.com to explore our wide range of high-quality silicone LED strips and lighting solutions. Our team of experts is dedicated to helping you bring your lighting vision to life.
High Quality Assurance Professional choice factory supply.
Excellent public repution reassured purchasing
Professional design Personalized lighting product idea design
Fast sample making | fast proofingSamples can be made within 48 hours
About
SHENZHEN LEDWAY LIGHTING CO.,Ltd is a manufacturer which integrating R&D, manufacture and sales. Current factory area is 1800 ㎡, 5 high spend SMT machines, 2 reflow soldering machines, 5 production lines, 80 skilled workers as well as the professional R&D team, sales and service team...
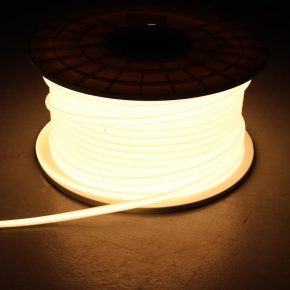
In the past 10 years, LEDway focuses on led strip, such as DC&HV strip, COB&SMD strip, neon led strip, have rich-experience in led strip area. In recent year, with strong R&D ability, we also have developed led cabinet light, sensor night light, atmosphere light. Hot selling in Americas and European market. Most of our products have passed CE ROHS, ETL, GS, KC..
Contacts
-
- Address
- The 5rd floor, factory building, Jianghai industrial Park, Yonghe road No. 7, Shiyan street, Baoan district, Shenzhen, China.
-
- jelly@ledwaylighting.com
-
- We are open
- Mon-Fri: 08:00 - 18:00