Manufacturing Process of LED Strip Lights: A Comprehensive Guide Introduction
Manufacturing Process of LED Strip Lights: A Comprehensive Guide
Introduction
LED strip lights have revolutionized the lighting industry with their flexibility, energy efficiency, and versatility. From accent lighting in homes to dynamic displays in commercial settings, LED strip lights offer a myriad of possibilities. But how are these lights manufactured? This article delves into the intricate manufacturing process of LED strip lights, shedding light on each step involved.
Step-by-Step Manufacturing Process
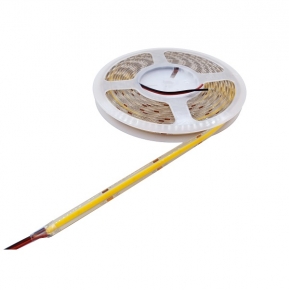
Step 1: SMD LED Strip Production
The journey of an LED strip light begins with the production of Surface Mounted Diodes (SMD LEDs). These tiny, light-emitting components are mounted onto an aluminum substrate for better heat dissipation. A protective transparent epoxy resin is then applied to encapsulate the LEDs, safeguarding them from damage during transportation and assembly.
Step 2: Solder Paste Printing
Next, solder paste is meticulously printed onto both sides of the Printed Circuit Board (PCB) using a computer-controlled screen printer. This paste acts as a conductive agent, ensuring electrical connections between the various components that will be placed on the PCB.
Step 3: Component Placement (SMT)
Automated Surface Mount Technology (SMT) machines, also known as pick-and-place machines, are used to precisely position the SMD LEDs and other components onto their respective pads on the PCB. These machines operate with high precision and speed, capable of placing hundreds of components per minute.
Step 4: Reflow Soldering
The PCB, now adorned with components, is passed through a reflow oven. Here, the solder paste melts, bonding the components to the PCB, creating solid electrical connections. The reflow process ensures reliable and consistent soldering across all components.
Step 5: Final Soldering and Inspection
Post-reflow, any additional soldering might be required to secure larger components or connectors. Each LED strip light then undergoes a rigorous inspection process to ensure that all components are correctly placed and functioning as intended.
Step 6: Aging and Waterproofing
To ensure durability and reliability, LED strip lights undergo an aging process, where they are subjected to continuous operation for an extended period. Additionally, many strips are waterproofed to make them suitable for outdoor applications, enhancing their versatility.
Step 7: Tape Pasting and Packaging
Finally, the LED strip lights are adhered to a backing tape for easy installation. They are then packaged in protective boxes or rolls, ready for shipment to customers or retailers.
Factors Affecting Quality
· PCB Quality: The quality of the PCB significantly impacts the overall performance and longevity of the LED strip light. High-quality PCBs with adequate copper content ensure efficient electricity transfer and heat dissipation.
· Component Quality: The quality of the LEDs and other components directly influences the light output, color accuracy, and lifespan of the strip light.
· Assembly Precision: Precise assembly ensures that all components are correctly aligned and functioning, minimizing the risk of failures or malfunctions.
· Protection Measures: Waterproofing and silicone covering protect the LEDs from environmental factors, enhancing their durability and reliability.
Why Choose LEDWAY for Your LED Strip Light Needs?
At LEDWAY, we pride ourselves on manufacturing high-quality LED strip lights using state-of-the-art technology and materials. Our stringent quality control measures ensure that every strip light we produce meets the highest standards of performance and reliability.
Ready to upgrade your lighting solutions with LEDWAY's premium LED strip lights? Contact us today at sales2@ledwaylighting.com to place your order and experience the difference that quality manufacturing can make.
High Quality Assurance Professional choice factory supply.
Excellent public repution reassured purchasing
Professional design Personalized lighting product idea design
Fast sample making | fast proofingSamples can be made within 48 hours
About
SHENZHEN LEDWAY LIGHTING CO.,Ltd is a manufacturer which integrating R&D, manufacture and sales. Current factory area is 1800 ㎡, 5 high spend SMT machines, 2 reflow soldering machines, 5 production lines, 80 skilled workers as well as the professional R&D team, sales and service team...
In the past 10 years, LEDway focuses on led strip, such as DC&HV strip, COB&SMD strip, neon led strip, have rich-experience in led strip area. In recent year, with strong R&D ability, we also have developed led cabinet light, sensor night light, atmosphere light. Hot selling in Americas and European market. Most of our products have passed CE ROHS, ETL, GS, KC..
Contacts
-
- Address
- The 5rd floor, factory building, Jianghai industrial Park, Yonghe road No. 7, Shiyan street, Baoan district, Shenzhen, China.
-
- jelly@ledwaylighting.com
-
- We are open
- Mon-Fri: 08:00 - 18:00